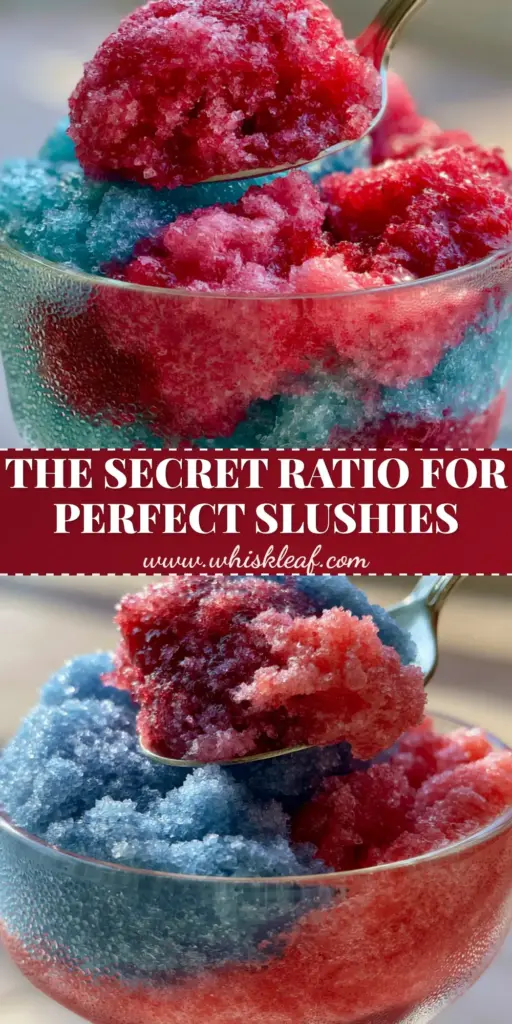
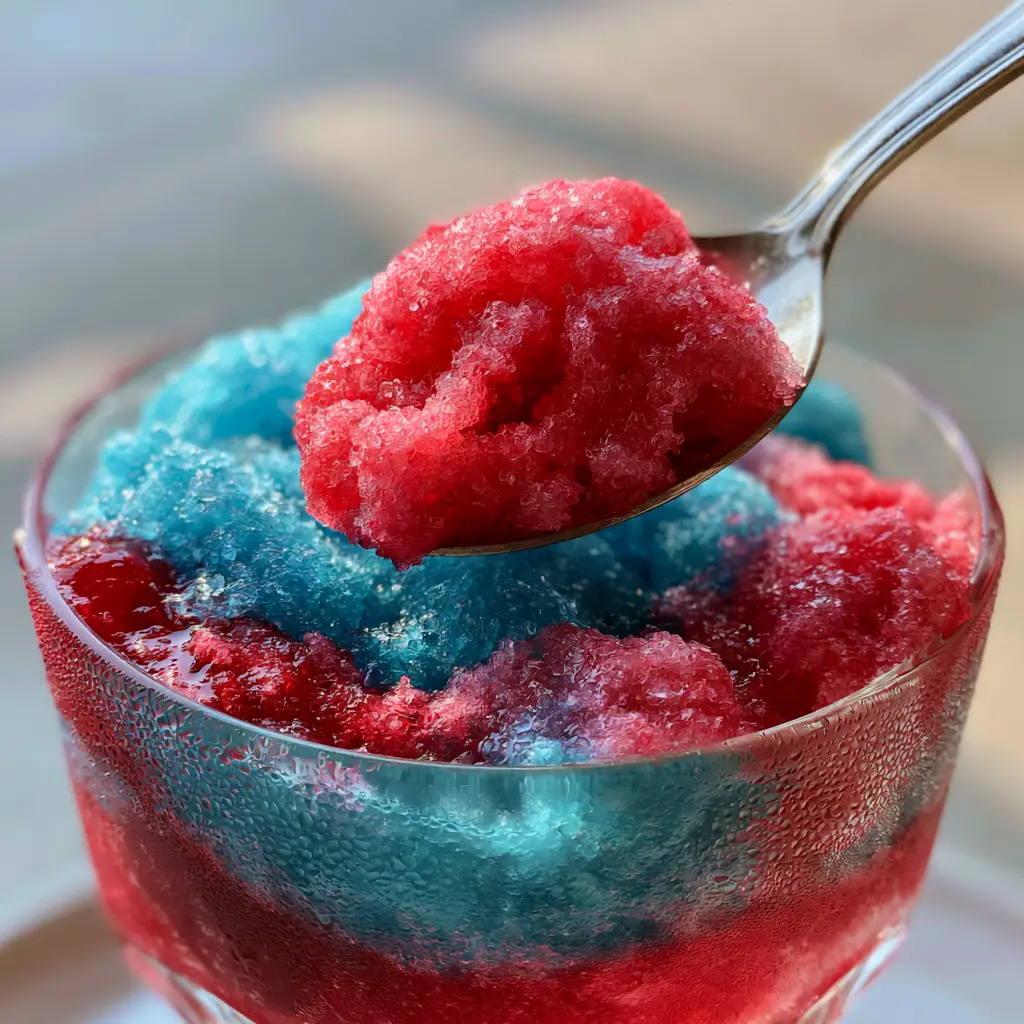
When the summer heat hits its peak, nothing beats the restorative chill of professional-grade slushie machine recipes. Imagine a heavy crystal glass, slick with tiny condensation droplets, filled with a vibrant, neon-hued elixir that defies the laws of physics. We aren’t talking about chunky, crunchy ice; we are crafting a velvet-smooth, spoonable masterpiece.
Achieving that iconic, micro-crystalline ice base requires a delicate balance of science and flavor. In this guide, we will break down the exact ratios needed to create a dense, spoonable texture that holds soft peaks. Whether you are using a commercial-grade motor or a high-end home unit, these techniques will transform your kitchen into a gourmet boardwalk stand.
The visual appeal is just as important as the taste. From the faint mint sprig garnish to the frost clinging to the glass rim, every detail of these slushie machine recipes is designed to impress. Prepare to dive into a world of saturated colors and electric flavors that look as good as they taste.
The Anatomy of a Perfect Spoonable Slushie
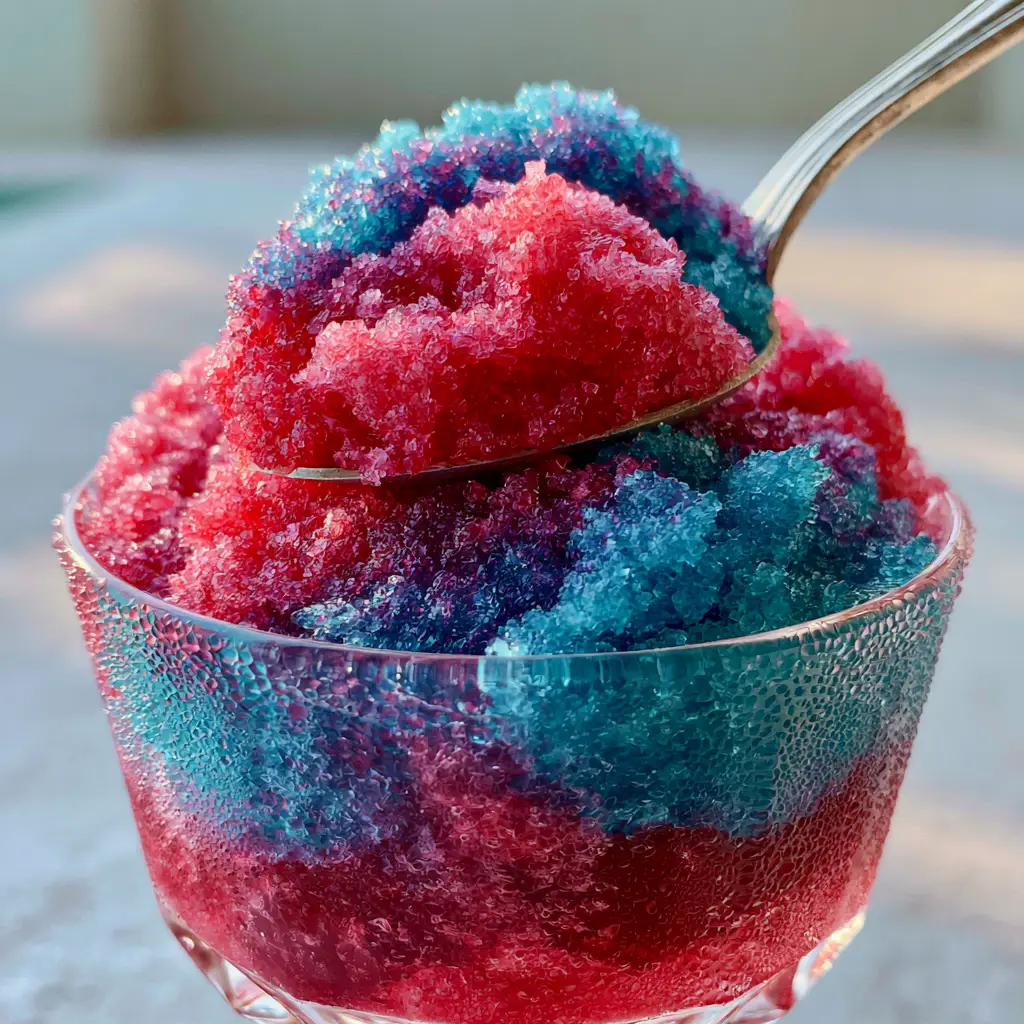
- Micro-Crystalline Texture: Our recipe focuses on a “velvet-smooth” finish that allows a silver spoon to lift a perfect mound without the ice collapsing.
- Vibrant Electric Layering: Learn the density secrets to keeping your concentrated blue raspberry and deep red cherry syrups perfectly separated.
- Professional Aesthetics: We include steps for a fine granulated sugar crystal rim and those “hero” sensory details like condensation and frost.
- Scientifically Balanced Brix: The sugar content is precisely calculated to ensure the machine creates soft crystals rather than a solid block of ice.
The “Secret” Ingredients for Professional-Grade Slushies
Concentrated Blue Raspberry Syrup: 1 cup (240ml). This provides the electric blue base; ensure it is a high-sugar concentrate to maintain the freezing point depression needed for smoothness.
Deep Red Cherry Syrup: 1 cup (240ml). The heavy density of quality cherry syrup allows it to sit beneath or atop the raspberry layer without immediate bleeding.
Fine Granulated Sugar: 1/4 cup (50g). While the syrups provide sweetness, this extra sugar is used both for the frosted rim and to fine-tune the “spoonable” internal structure.
Filtered Water: 4 cups (950ml). Using filtered water ensures no mineral aftertaste interferes with the “electric” flavor profile of the syrups.
Fresh Mint Sprigs: 4 small sprigs. A faint mint garnish provides a botanical aroma that cuts through the intense sweetness of the berries.
Citric Acid (Optional): 1/4 tsp (1g). A tiny pinch of citric acid enhances the “tang” of the blue raspberry, making the flavor as bright as the color.
Essential Tools for Micro-Crystalline Success
To achieve the result seen in high-end photography, a standard blender often falls short. You will need a dedicated counter-top slushie machine or a high-performance specialized freezing bowl. These machines constantly churn the liquid as it freezes, preventing large ice crystals from forming.
You will also need heavy crystal glassware. The thick walls of crystal hold the cold longer, encouraging the formation of those beautiful condensation droplets. A long-handled silver spoon is the final requirement for that “scoopable” serving style that defines a premium frozen treat.
Step-by-Step: Crafting the Layered Masterpiece
Step 1: Preparing the Micro-Crystalline Base
In a large pitcher, combine 2 cups (475ml) of filtered water with the concentrated blue raspberry syrup. Stir vigorously until the mixture is completely homogenous. If you are making a larger batch for summer batch cocktails, ensure your ratios remain consistent.
Pour the blue mixture into your slushie machine. Turn on the freezing and churning function. Watch for the sensory cue: the liquid will transition from a translucent blue to an opaque, matte finish. This indicates the formation of micro-crystals.
Step 2: Freezing the Cherry Layer
While the blue layer is churning, repeat the process in a separate container (or sequentially) with the deep red cherry syrup and the remaining water. The cherry layer should be slightly denser to assist with the visual layering. This technique is similar to creating homemade cherry limeade but with a much higher solids-to-liquid ratio.
Step 3: The Frosted Rim Technique
Take your heavy crystal glass and run a damp cloth around the outer 1/4 inch of the rim. Dip the glass into a shallow bowl of fine granulated sugar. The crystals should cling to the glass, creating a “frost” effect that mimics the freezing temperature of the drink.
Step 4: Precision Layering and Serving
Once both flavors have reached a “velvet-smooth” consistency, begin the assembly. Use a spoon to gently place the cherry slushie into the bottom half of the glass. Smooth the top with the back of the spoon.
Carefully layer the blue raspberry slushie on top. Because of the micro-crystalline structure, the layers should sit firmly on one another. Use your silver spoon to lift a “mound” on top, creating soft peaks that catch the natural afternoon sunlight.
Expert Tips for the Ultimate Slushie Texture
- The Temperature Factor: Always pre-chill your syrups and water. Starting with room temperature liquids takes longer to freeze and can result in larger, crunchier ice shards.
- Sugar is Key: If your slushie isn’t “spoonable,” it likely needs more sugar. Sugar acts as an anti-freeze, keeping the crystals small and soft.
- Avoid Over-Churning: Churning for too long can actually introduce too much air, making the slushie “foamy” rather than “velvet.” Stop when the mixture holds its shape on a spoon.
- Garnish Timing: Add the faint mint sprig only at the very last second. This prevents the herb from wilting against the intense cold of the micro-crystals.
Storage and Preservation
Slushie machine recipes are best enjoyed immediately. However, if you have leftovers, you can store the mixture in an airtight container in the freezer. Before serving again, let it sit on the counter for 5-10 minutes and give it a vigorous stir to break up any large crystals that formed during static freezing.
If you enjoy frozen textures, you might also like experimenting with refreshing wine slushies or even a classic strawberry daiquiri, which use similar freezing principles but with different flavor bases.
What to Serve With Your Electric Slushies
These intense, sweet treats pair beautifully with salty or savory summer snacks. Consider serving them alongside a fresh homemade pico de gallo and chips to balance the sugar. The bright acidity of the blue raspberry also complements a light summer corn salad.
For a full patio spread, these slushies provide a cooling contrast to grilled dishes. They are the perfect palate cleanser after a meal of grilled chicken orzo salad or a hearty zucchini gratin.
Frequently Asked Questions
While a blender can crush ice, it won’t achieve the ‘micro-crystalline’ velvet texture without a constant churning mechanism during the freezing process.
The key is the density and temperature. Ensure the bottom layer is slightly thicker (more sugar) and both layers are frozen to a firm, spoonable consistency before assembly.
Depending on the machine and the starting temperature of your liquid, it typically takes 40-60 minutes to reach the perfect micro-crystalline state.
Fine granulated sugar works best because the smaller crystals cling better to the cold glass and provide a delicate ‘frost’ look without being overly crunchy.
Chunky ice usually results from a low sugar-to-water ratio. Sugar acts as an antifreeze to keep crystals small; ensure you are using concentrated syrups and following the Brix balance.
The Ultimate Slushie Machine Recipes: Blue Raspberry & Cherry
Slushie Machine Recipes: Master the Art of Micro-Crystalline Layered Sips
Ingredients
Equipment
Method
- Combine blue raspberry syrup and 2 cups of chilled water in a pitcher. Stir until fully integrated.
- Pour into the slushie machine and churn until it reaches a matte, micro-crystalline state that holds its shape.
- Repeat the mixing process with the cherry syrup and remaining water. Churn until velvet-smooth.
- Dampen the rim of a crystal glass and dip into fine sugar to create a frosted effect.
- Spoon the cherry layer into the bottom, top with the blue raspberry layer, and garnish with mint.
Notes
Ensure the sugar-to-water ratio is high enough to prevent large ice chunks.
This recipe delivers a nostalgic flavor profile with a sophisticated, professional texture. By mastering the micro-crystalline ice base, you can recreate that saturated, electric look seen in the world’s best food photography. Don’t forget to use the silver spoon for the ultimate sensory experience!
Closing & Call to Action
Ready to level up your summer drink game? These slushie machine recipes are just the beginning of what you can create with the right ratios and a bit of patience. If you loved the velvet-smooth texture of this recipe, please leave a comment below and let us know your favorite flavor combinations!
For more vibrant recipe inspiration and visual guides, follow us on Pinterest and share your creations with the community. Happy churning!