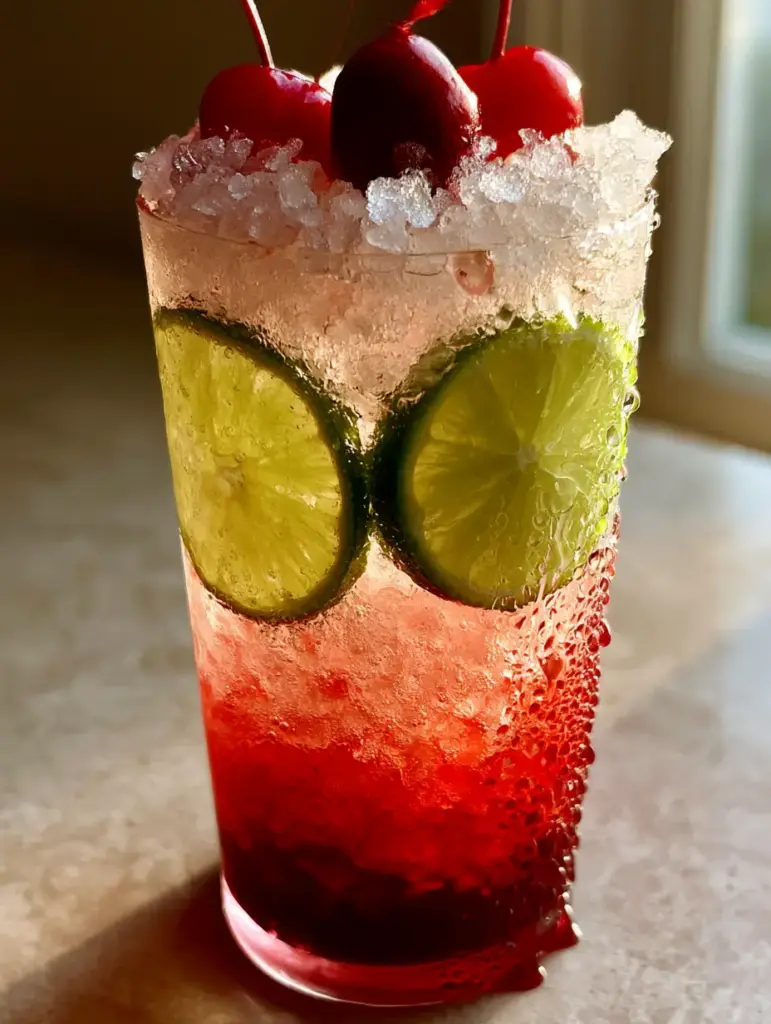
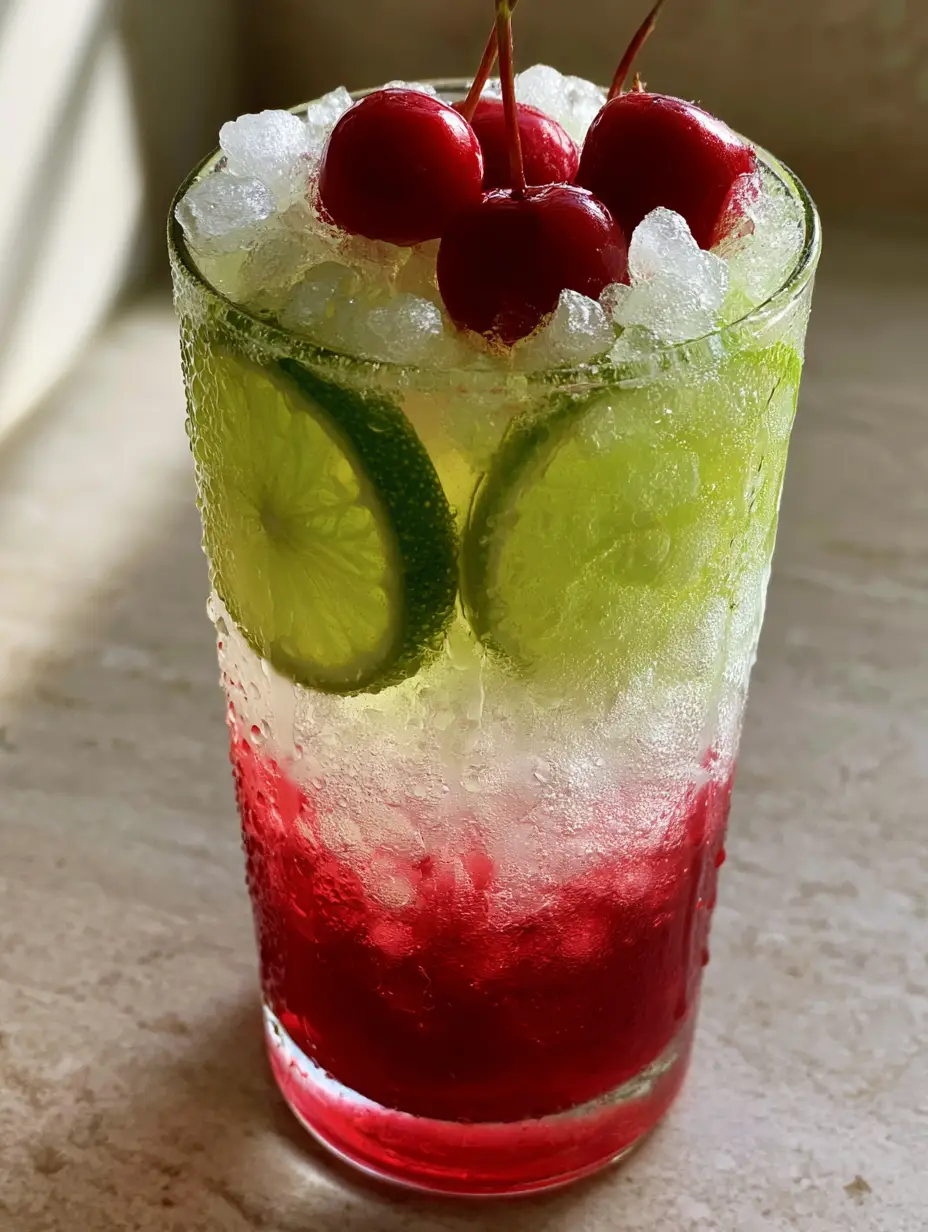
There is nothing quite like the sight of a tall, frosted glass of a homemade cherry limeade recipe on a sweltering July afternoon. As the soft natural morning sunlight hits the countertop, the vibrant crimson red of the cherry syrup glows against the bright green of fresh lime wheels. This isn’t just a drink; it is a sensory experience designed to quench your thirst and dazzle your guests.
The secret to an elite cherry limeade recipe lies in the contrast of textures and temperatures. Imagine the fine beads of cold condensation dripping down a clear highball glass while you hear the satisfying crunch of specific small, nugget ice pellets. Every sip offers a transition from the thick, deep red syrup at the base to the light, fizzy carbonation of the limeade above.
Whether you are hosting a backyard barbecue or just need a mid-day pick-me-up, this recipe delivers professional results with simple techniques. By focusing on the visual layering and the science of carbonation, we can recreate that iconic drive-in beverage experience right in your own kitchen. Let’s dive into how to construct this masterpiece.
Why This Refreshing Cherry Limeade Recipe Stands Out
- Visual Masterpiece: The striking ombre effect from the deep crimson syrup to the translucent limeade makes this a high-end presentation for any occasion.
- Textural Perfection: Utilizing nugget ice pellets provides that signature “crunchable” quality that holds the flavor better than standard cubes.
- Balanced Flavor Profile: We balance the intense sweetness of maraschino cherries with the sharp, acidic bite of freshly squeezed lime juice.
- Garnish Excellence: Glossy maraschino cherries with stems and pressed lime wheels ensure every glass looks like it was styled for a magazine.
The Essential Elements for a Vibrant Cherry Limeade Recipe
To achieve the specific visual and flavor profile described in our blueprint, each ingredient must be selected and prepared with care. Here is what you will need to gather for your kitchen counter.
Maraschino Cherry Syrup: 1/2 cup (120ml) of concentrated syrup. This provides the “thick, deep crimson red” base that anchors the drink visually and provides the primary sweetness.
Fresh Lime Juice: 1/4 cup (60ml) of freshly squeezed juice. Real lime juice is essential for the “bright, translucent” quality and providing the necessary acid to cut through the sugar.
Carbonated Water or Lemon-Lime Soda: 1.5 cups (355ml) of your preferred fizzy base. This creates the “visible carbonation bubbles” and the refreshing lift that makes the drink so craveable.
Nugget Ice Pellets: 2-3 cups (approx. 400g-600g). Small ice pellets are critical for the “overflowing” look and the specific mouthfeel of this iconic beverage.
Fresh Lime Wheels: 2 thinly sliced rounds per glass. These are pressed against the glass to create that professional, high-resolution food styling aesthetic.
Maraschino Cherries with Stems: 3 cherries per serving. These glossy beauties are nestled into the top of the ice for the final touch of elegance.
Simple Syrup (Optional): 1-2 tbsp (15-30ml) if using plain sparkling water. This ensures the limeade portion is perfectly sweet without being overpowering.
Professional Tools for the Perfect Pour
Achieving the look of a handheld smartphone photo with high resolution requires more than just ingredients; it requires the right vessels. Use a tall, clear highball glass to allow the layers to be fully visible from top to bottom.
A long-handled bar spoon is also highly recommended. This allows you to stir the bottom layer gently if desired, or to help guide the carbonated water over the syrup without mixing the layers prematurely. If you don’t have a nugget ice machine, you can often purchase this “sonic ice” from local fast-food chains or use a specialized ice mold.
Mastering the Art of the Perfect Layered Pour
Step 1: Preparing the Crimson Foundation
Start by pouring 1/2 cup (120ml) of the concentrated red cherry syrup directly into the bottom of your clear highball glass. Ensure the syrup doesn’t splash against the sides of the upper glass to keep the transition line between the red base and the clear limeade sharp and clean.
Step 2: Styling the Lime Wheels
Take your two bright green lime wheels and use a long spoon or your fingers to press them firmly against the inside wall of the glass. The syrup at the bottom will help “glue” the bottom of the wheels in place. This visual step is essential for that “realistic food styling” look where the fruit appears suspended in the ice.
Step 3: The Nugget Ice Avalanche
Carefully fill the glass to the very brim with your small nugget ice pellets. You want the glass to be “overflowing” slightly. As the ice settles against the lime wheels, it will lock them in place. The small gaps between the pellets are what will eventually hold the carbonated limeade and create the “fizzy” appearance.
Step 4: The Carbonated Limeade Infusion
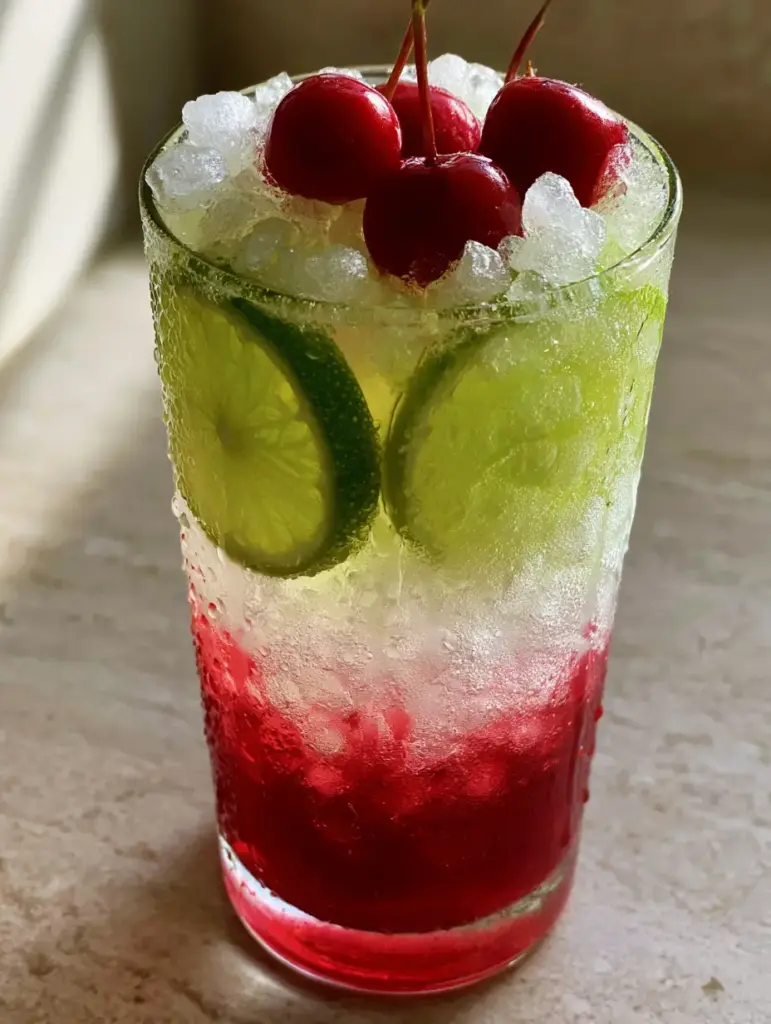
In a separate small pitcher, mix your 1/4 cup (60ml) of fresh lime juice with 1.5 cups (355ml) of carbonated water. Slowly pour this mixture over the ice. Watch as the “bright, translucent, fizzy limeade” fills the glass, sitting atop the “thick, deep crimson red cherry syrup base” to create a stunning gradient effect.
Step 5: The Final Glossy Garnish
Nestle three glossy maraschino cherries with stems right into the crown of the nugget ice. The stems should stand up slightly, catching the “soft natural morning sunlight.” Within seconds, you should see “fine beads of cold condensation” beginning to drip down the side of the glass, signaling the drink is at its peak temperature.
Expert Tips for Cherry Limeade Perfection
- Chill Your Glassware: Place your highball glass in the freezer for 10 minutes before starting to accelerate the formation of those beautiful condensation droplets.
- Temperature Control: Ensure your carbonated water and cherry syrup are thoroughly chilled before assembly to prevent the nugget ice from melting too quickly.
- The Gentle Pour: To keep the layers distinct, pour the limeade over the back of a spoon held just above the ice. This breaks the fall of the liquid and prevents it from churning up the syrup.
- Ice Quality: If you cannot find nugget ice, you can pulse standard ice cubes in a high-speed blender for 2-3 seconds to create a “crushed” effect that mimics the texture.
The Science of the Gradient: Why It Layers
The visual success of this cherry limeade recipe relies on fluid density. The concentrated cherry syrup has a high sugar content, making it significantly denser (and heavier) than the limeade mixture. When poured carefully, the limeade will naturally float on top of the syrup.
As you drink through a straw, you can control the flavor profile by pulling from the bottom for a burst of cherry, or lifting the straw for the tart limeade. This interactivity is part of why this drink is such a classic at summer gatherings.
Perfect Pairings for Your Summer Sips
This vibrant drink is the perfect companion for a variety of seasonal dishes. The acidity of the lime cuts through rich, savory flavors beautifully. Try serving it alongside a classic creamy macaroni salad or a fresh homemade pico de gallo with chips.
For a full cherry-themed experience, you might even pair it with a sweet cherry dessert pizza for a double dose of fruit flavor. If you’re looking for something more substantial, the limeade balances the herbal notes of an orzo with asparagus and peas dish perfectly.
How to Store and Scale Your Limeade
While this drink is best enjoyed immediately to preserve the “visible carbonation bubbles,” you can prep the components in advance. Store the fresh lime juice and cherry syrup in airtight containers in the refrigerator for up to 5 days.
If you are making this for a crowd, do not assemble the drinks until serving. You can mix the lime juice and carbonated base in large batches, but keep it in a sealed growler to maintain the fizz. If you have leftovers, consider using your slushie machine recipes to turn the mixture into a frozen treat.
Frequently Asked Questions
Yes, but for the specific visual in this recipe, you’ll need to simmer real cherries with sugar and water to create a thick, vibrant red syrup that matches the maraschino aesthetic.
The key is density. Ensure your cherry syrup has a high sugar content and pour it first. When adding the limeade, pour it very slowly over the back of a spoon to prevent mixing.
Press the lime wheels against the glass before adding the ice. Once you pack the nugget ice in, the pressure of the ice pellets will hold the lime wheels firmly in place.
This recipe is designed to be balanced. The tartness of the fresh-squeezed lime juice is meant to counteract the sweetness of the cherry syrup. You can adjust the lime-to-syrup ratio to your taste.
You can often buy ‘the good ice’ in bags from fast-food chains like Sonic, or you can use a home nugget ice maker. Alternatively, pulse regular ice in a blender for a few seconds.
The Ultimate Cherry Limeade Recipe Card
Cherry Limeade Recipe: The Ultimate Refreshing Summer Sip
Ingredients
Equipment
Method
- Pour the concentrated red cherry syrup base into the bottom of a clear highball glass.
- Press two green lime wheels against the inside of the glass using a spoon to hold them in place.
- Fill the glass to the brim with nugget ice pellets, ensuring the lime wheels stay pinned against the glass.
- Slowly pour the mixture of lime juice and carbonated water over the ice to create the fizzy top layer.
- Top with three maraschino cherries with stems and wait for condensation to form before serving.
Notes
Use high-quality maraschino syrup for that deep crimson visual effect.
Closing Thoughts on This Summer Classic
Mastering the cherry limeade recipe is a surefire way to become the hero of your next summer hangout. The combination of visual beauty, the crunch of nugget ice, and the sharp, refreshing flavors of cherry and lime is simply unbeatable. The morning sun highlights on the ice and glass make it almost too pretty to drink—almost!
If you enjoyed this recipe, please leave a comment below and let me know how your layers turned out! Don’t forget to sign up for our newsletter for more culinary forensics and follow juliaflavor on Pinterest for more inspiration. Share your beautiful creations and tag us!